Monday, September 19, 2011
Eden... A Project In The Works, The Eden Landing Ecological Reserve
In California, we seem to always be trying to get things "back to the way they were". Case in point, the various salt ponds used for taking ocean water and evaporating them until large masses of salt is formed for bulldozing and harvesting. Many of those are being converted back into wetlands for birds and other dwellers.
Saturday, September 3, 2011
Bridge To Somewhere
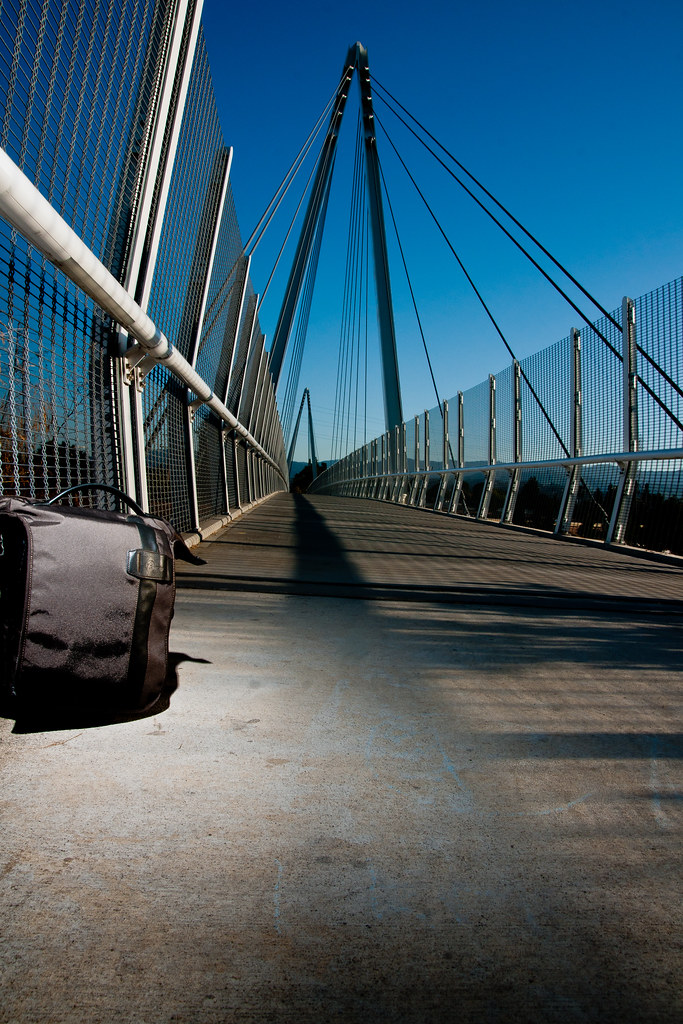
The above shot is my submission to the Strobist Boot Camp #3, Assignment #3. For folks living in Cupertino, this is the bridge that crosses the 280 freeway. I shot this late in the afternoon, hoping to get some interesting shadow play from the structure of the bridge. While I live on the south end of the bridge, I walked across the bridge a few times and decided to take a photo of the bridge from the northern side, as I liked the way the light was playing off of the structure and the floor.
Photographed with camera on tripod, low to the ground. Flash was hand held and triggered with a pair of Pocket Wizard PlusII's. The bag in the picture is my camera bag, lit by the flash at full power, while the camera was stopped down to help over power the sun. The image was post processed in LR3 and submitted to the Strobist Flickr pool.
Lately, I've been enjoying photographing landscapes more, and trying to develop my creative vision with the help of my much more creatively minded wife. This photograph is an example of that awesome collaboration.
W.
Thursday, September 1, 2011
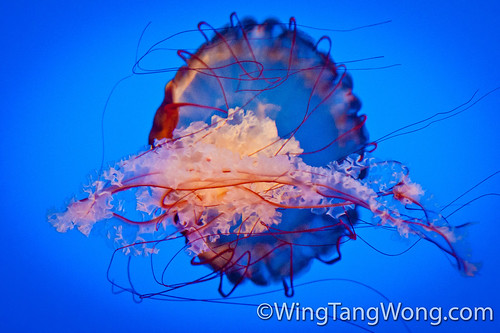
Black Sea Nettle
Wednesday, August 31, 2011
Re-iterating My Dislike of Photographers Who Can't Turn Off Their Flash
 |
| Photo ruined by someone's popup flash. |
 |
| Sea Turtle |
Thursday, August 25, 2011
Shrinking Down JPEGS! ( JPEGmini )
It details a company that has come up with a way to optimize an image so that it visually looks virtually identical to the original, but takes up a fraction of the original file size. That's awesome! I even tested it against some image files:
 |
| Black Sea Nettles - JPEG shrunk using custom algorithm. |
- 24 megapixel JPEG / 12MB in size => 1.6MB resulting file after JPEGmini.
- 12 megapixel JPEG / 4.8MB in size => 1.1MB resulting file after JPEGmini.
Tuesday, August 16, 2011
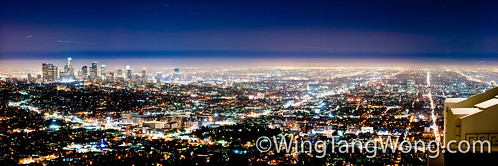
Panorama of Los Angeles at night from Griffith observatory
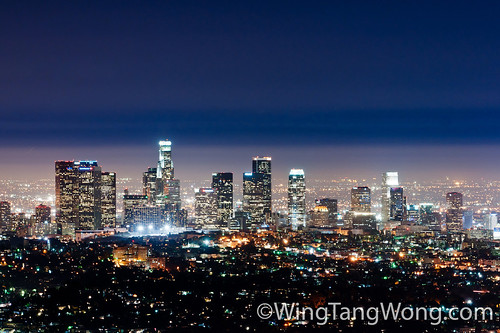
Long exposure shot of Los Angeles and its downtown towers
Tuesday, August 9, 2011
Managing Resources - Part II
How Did It Go?
If you read part 1, you'll note I went with a big box, lots of cpu cores, ram, and storage. I opted for complexity and multiple layers of abstraction to get all the features I wanted. I opted to get ZFS by emlpoying Nexenta and other Solaris derived solutions. Virtual machines to get the best of both worlds, and leveraging PCI-passthru to get a desktop experience on a virtualized server platform.
In short, this did not work out very well. :(
Sunday, August 7, 2011
Planning For Gear Upgrades
Memory Cards
I'm a consumate user of compact flash. I own and use PhotoFast 16GB and 32GB cards, both rated at 533X. They are great performers and are rock solid. Needless to say, I've spend a bit of money in getting them when 533X compact flash cards were fairly new. They work great in the A700 and I had hoped to continue to use them in the A77. However, Sony decided against including support for compact flash. Instead, it will be Memory Sticks and SD cards.
Sunday, July 31, 2011
Happy Mistakes... A Panorama of The Gold Gate Bridge
However, I'm a big believer in making lemonade out of lemons, and here is my lemonade from my lemon moment:
 |
| Golden Gate Bridge - shot from Crissy Field (click for larger image) |
Friday, July 29, 2011
Sony Alpha A77 DSLR Rumours...
Thursday, July 28, 2011
How To Get Great Shots With The Sony Alpha A700 - Part 0
This is the first post in a series I will be writing up, which documents how to get the most out of the Sony Alpha A700 DSLR. I'll continue to add to this until I am no longer an owner of said camera. :)
Tuesday, July 26, 2011
Look Before You Leap... or Ride The Lion...
Being a user of Adobe products: Lightroom & PS CS5 w/plugins, I wanted to give the platform time to settle down before plunging ahead. After all, what good is an upgraded OS without working applications?
- Adobe has put up a support page, detailing some issues that Lion users may experience.
- Rosetta, the Apple PowerPC emulator is no longer included. So any plugins/applications/etc. that depended on it will now stop working.
- FotoQuote/Fotobiz has likewise sent out emails detailing compatibility issues with Mac OS X Lion.
- The Java runtime environment isn't installed by default by Lion, causing issues for users.
- The swiping/preferences panes/auto-recovery don't work out of the box for third party applications not specifically coded for those features.
- The ~/username/Library folder is now hidden, causing some issues for people.
- USB-to-Serial adapter drivers stopped working for some, due to the drivers being 32bit and Lion being 64bit only.
Wednesday, July 13, 2011
The Weakest Link (in your lighting setup)
 |
| Julie - Portrait shot for Strobist Boot Camp III - #1 |
At first, I thought the brass interconnect, lovely called the "brass monkey" by many, had broken. As it turns out, it was an el'cheapo $1.50 1/4" to 3/8" thread converter I had used to marry some disparate parts together, which broke.
Unfortunately, this curtailed our shoot, but thankfully, I was able to get some shots I liked.
Lessons learned:
- Backups! - ALWAYS have backups.
- K.I.S.S. - If I'm hacking together different parts together to save $8 on the correct part, I'm probably setting myself up for some pain down the road. Time to re-evaluate and clean up my setups.
Thursday, June 30, 2011
How I'm Using Social/Online Services
Recently, I rejoined the land of Flickr and have started posting images again. Then, I joined another site, 500px.com at the recommendation of a fellow photographer. Right now, I'm looking into a couple more online sites. Also recently heard about OpenPhoto.me, so guess I'll check that out as well.
This leads me to this post: How I'm using these sites and what I'm posting to each, since it would kind of be pointless to post all to all.
Quick Rundown...
What follows is a sort of rough timeline and account of what goes where:
The Photoshoot
This is where the "magic" happens. Me, my subject, and my camera. *snap* *snap* *snap* Depending on the shoot, I'll have a few dozen to a few hundred images to work from. In this example, we will go with having 100 shots from the photoshoot, good/bad/etc.
The images are all imported into Adobe Lightroom 3 on my macbook pro, to an external hard drive, previews are generated, images are tagged, then I go through the first culling.
Basically, shots that work, get flagged as such, being given a rating from 3-5 stars. Great shots are flagged as picks.
All rated and picked images are put into a collection and are given some post processing love, before being exported as full sized JPEG(s).
Generally, the cull results in 20-30 images out of an original 100 images. Partly due to double-shooting/safety-shooting(event, vacation, etc). For shots involving an off camera flash and composed shots, it's more like 50-60 images out of 100 images. But we'll go with the 20-30 image number here.
To The Vault
The first destination for the images, other than my external hard drive and the fileserver, is to upload to Smugmug and SmugVault. I have the system setup to do watermarking, and they generate variously sized thumbnails and galleries for me. Woot.
Once the images are up and online, I check the tagging information, captions, titles, etc.
Anything that doesn't look right after upload, I hide or remove, and maybe cull a bit more.
At this point, I might post a link to my gallery to FaceBook. I should still have around 20 or so images at this point. :)
Flickr
At this point, I want to share some of the images with the Flickr pool, and will look through my images once again, and choose a select few to post to Flickr. This could be another 40-50% cull, bringing down the 20 from the SmugMug posting to maybe 10 images in the Flickr pool posting.
500px
500px.com is a new site a fellow photographer recommended to me. The bar is pretty high here, so I've elected to only post images that I'm honestly happy about and have no qualms about. So, from the 10 or so images from the Flickr pool, I'll choose maybe 2-3 images. Sometimes, just one.
Why?
I actually arrived at this model after attending Zack's workshop and attending a few CreativeLive workshops. Basically, you want your best work out there... and that is not every image that you produce. For the longest time, SmugMug has been the dumping ground for just about every image I've shot and processed. It has alot of legacy stuff in there. :) So I'll leave it be. However, the new presence on Flickr and 500px, I want them to be more representative of my online portfolio, and for that, I want what is displayed there to be the best that I can produce. This tiered approach makes it easier for me to cull, as I don't feel like I'm throwing anything away, just filtering and letting each tier of images go to where they will.
Tuesday, June 28, 2011
David Hobby's Strobist Boot Camp III Has Started!
David Hobby, of Strobist fame, has begun the third installment in his BootCamp series. The Bootcamps are his special way of creating assignments for people to work on, submit, and the winner gets a prize. It's motivation for those photographers who would otherwise sit on their butts and read about photography vs actually going out and shooting. (This actually sounds alot like me of late! ^_^;;)
The first assignment is a portrait of someone important in the community, shot simply and lit with 1 or 2 speedlights.
The deadline is Saturday, July 9th, 1700 hours GMT. (That's noon Eastern in the US.)
I'm pretty excited. Last time, I only got through a few assignments in BootCamp II before I ran out of juice, with work and school/etc. So this time around, hoping to do better. :)
The resulting images are being posted in the Strobist flickr pool, tagged with "bc31".
Tuesday, May 24, 2011
Inspiration that destroys...
http://www.creativelive.com/courses/zack-arias-again
And one of the things that struck me is that my gallery is more a clumping of images I've taken over the years, rather than being a gallery of my best work. So... slowly, bit by bit, I'm going to break down the site and make something leaner, less clumpy, and perhaps a bit better.
Same for this blog. :)
Sunday, May 22, 2011
Thoughts from a new iPhone covert
Tuesday, May 3, 2011
Upgrades, Do I Really Need Them?
Friday, April 1, 2011
Waiting For Supe^H^H^H^H Sony's New A77
While not nearly as dire and not as heart wrenching, I feel like I've been waiting for a superman for the last couple of years. If you've met me and we've talked about photography and cameras... or if you read this blog with any regularity, you'll know that I'm a Sony shooter, having inherited it from being a Konica Minolta shooter.
Friday, February 25, 2011
The Future Draws Near ( Thoughts on Sony DSLR/DSLT cameras )
I brought with me the following:
- Sony Alpha A700 DSLR
- Sony 70-400/G ssm lens
- Tamron 17-50 lens
After talking a bit, explaining that the 70-400 was a pretty good lens, and that I was able to rent it from BorrowedLenses.com, I decided to do a test: I took the 70-400 off of my A700, mounted it on their A580, and took some test shots.
Thursday, February 17, 2011
Some Chinese New Year Shoots and Experience with LSD Batteries
So lately, I've been doing a little bit of food photography when I can. I've found it to be a good deal of fun and a great way to test out lighting setups at home.
 |
| Chinese New Year Horns ©Wing T. Wong - Gallery |
Sunday, February 6, 2011
Working on DIY and new book via Kickstarter
DIY + Kickstarter + My Project
I was introduced to Kickstarter a couple of months ago and it dawned on me that it would be a good way to fund a project I have been keeping shelved for a while.
Like many other DIY strobists, I've made my fair share of foamcore soft boxes, salad bowl/garden pot beauty dishes, simple reflectors, and the like.
However, I've been wanting to build my own soft boxes that are more portable, and yet yielded good light. Working on that would require funds to buy the raw materials and tools, something I've not got in my budget for.
Kickstarter seems like a good way to go about achieving several things:
- Funding for raw materials, tools, and destructive testing.
- Compile the findings, DIY plans and illustrated instructions into an e-book and physical book.
- Get visibility so that people can get access to the book and make use of it to make their own lighting gear and get great light.
Some of the goals of this project is to make the DIY light modifiers to be easy find parts for, put together, and make use of.
Getting Approval From Kickstarter
One of the things about Kickstarter, which I love, is that they moderate which proposals get to proceed to the detailing and funding step. I had written up a quick draft of what I intended to do, what I intended to offer, and what rewards were to be offered for folks who backed me.
So, the good news: I got approved!
The bad news: I'm now working out the details of what all is involved in what I intend to acquire and make use of in my R&D, and fine tuning what I intend to give to backers for backing me.
I've already gotten a very good piece of advice and have been working on it, making better use of the rewards to increase value to potential backers. After all, it is through their generosity and belief in the project, which results in it getting funding.
Will post more on this, once I've submitted the details, and the project has been officially launched!
Wednesday, January 19, 2011
Looking Back
 |
| Photograph of a golf course. 35mm film photographed with DSLR. |
The images themselves are nothing special, but the idea that analog 35mm film was being digitized by an APS-C sensor'd camera was kinda cool.
Like the in the various DIY projects, I used a hot shoe flash to provide the consistent lighting. However, unlike the other DIY examples, I didn't use a large box. I went small. REALLY small. the "box" was an Apple USB dock cord box with holes cut into it. Taped to the front of the flash, well, more like onto the output window of the flash. A few sheets of tracing paper were placed inside to provide some diffusion. A couple of strips of cardboard served as film holder. Scotch tape and gaffers tape held it all together.
50mm f/22, 30mm extension tube, manual focus, and hand held. Flash was triggered via the now common audio jack cables. :) ISO 200, 1/200th exposure, and the LP160 flash unit was at like 1/4th power.
Changing the distance between the diffusion material and the negatives changed how much of a "texture" was applied to the resulting "scan" of the negative. Give enough distance, there is no grain. Reduce it some, and you can get some downright creepy results:
 |
| Cosplayers @ Anime Expo 1996. Film to digital conversion with DIY setup. |
As you can see, it's definitely got some creepy looking effects going on, ala Silent Hill(tm).
The shot images were, of course, color negatives. Loaded them into Lightroom, then edited them in Photoshop, where I inverted the colors, and brought them back into Lightroom to be cropped and tweaked. Lightroom REALLY needs an "Invert" option.
The dark spots are actually where the light was very bright, coming through the irregular texture of the tracing paper. It lends a VERY dark form of antiquing to the photograph, almost like mold/mildew, and I look forward to applying it to my normal photography in future shots.
Next time, though, definitely going to place the camera on a tripod. :)


